Friday, November 12, 2010

Princess Kristi

A very good friend of mine ordered a cake for her sister's 27th birthday extravaganza. She informed me that her sister likes the color pink and wanted a vanilla cake with vanilla buttercream. No problem. A few days later, she forwarded a picture of a pink cake, white accents and a tiara on top. THAT had to be Kristi's cake. And indeed it was.


Her majesty, Princess Kristi...


Happy, happy birthday to you, my dear!

Sunday, November 7, 2010

Presenting...Presents!!

Melissa, a friend of mine from high school, contacted me to make a cake for her daughter's 8th birthday party. Together we had fun (and sent MANY emails and pictures back and forth) finding the right cake for this special event. We figured that one cake wouldn't cover the guests she was inviting so Melissa decided on the "presents" you'll see here.

The pink "present" is a double-layer 8" chocolate cake with buttercream filling. The purple "present" is a double-layer 10" vanilla cake with buttercream filling.

I think that individually the cakes look really cute. But together, they totally make a statement. Featuring these cakes on the gift table at the party would be so fun!

Happy Birthday, Kaitlyn! I hope you have a great day and a fabulous birthday party!

Tuesday, October 26, 2010

Ho-Holy Delicious Cupcakes!

In celebration of a "Belated Boss's Day", my husband requested that I make cupcakes for his supervisor and team. Which ones, you ask? The Ho-Ho ones. Yes...they are totally awesome. And totally EASY to do.

I started out with chocolate cupcakes. I use Ina Garten's "Beatty's Chocolate Cake" recipe and it yields about 26 cupcakes. They only take about 15-20 minutes to bake, too, so they come together quite quickly!


I got my buttercream ready because filling the cupcakes is the first thing to do after they've cooled.


I filled my pastry bag with some buttercream and attach the tip pictured below. Each cupcake gets a squeeze of the filling right through the top of the cupcake.


So they all look like this when they're done.


Then, I melt down some store-bought chocolate frosting. This is honestly the only thing I buy from the store and don't make from scratch. It tastes great and I can work with it really easily.


After 60 seconds in the microwave, it looks nice and thinned out like this.


Just the top of each cupcake is dipped into the thinned icing and is given some time to dry a bit.


Then, I put on a different tip (#3) on my same pastry bag filled with buttercream...


...and I make little circles on top. Look familiar?


What's great about this recipe is that it makes 26 so my family gets a taste! Here's what they look like in the middle.

And this is what my husband will bring in to work tomorrow.


He knows he's lucky to have me. :) Happy Boss's Day!

Sunday, October 24, 2010

Princess Judy

I ran into my old debate partner, Melina, from high school last month at a local park. It was so great to see her and to catch up on life. Turns out, her daughter was turning 6 and was in desperate need of a "princess cake". I was honored to take on that task for her royal highness.

There were a lot of great princess cakes out there on the Internet so getting inspired took no time at all. Melina gave me free reign on EVERYthing, including the cake flavor and colors. She just told me that her daughter, Judy, loved the color pink and her favorite princess was Cinderella.

I knew I wanted a tiara to top the cake so I first tried to make one. I melted some white chocolate in the shape of a tiara, placed some fun candy jewels in it before it hardened and molded it around a circular can. Well, unfortunately, it crumbled. So, no go on the edible tiara.

I then went to Target and found a "Birthday Girl" tiara right around the princess section of the toy department. I was THRILLED to find that. What 6 year-old doesn't need a tiara? Come ON!! So I picked that up and made the tiara the inspiration for the color scheme of the cake.


I chose a marble cake because that flavor usually pleases everyone. I filled one with pink buttercream, the other with purple buttercream and covered each cake with fondant. The bottom tier, I covered with a pink overlay to look like cloth. The top tier had a quilted effect.


I used some white buttercream to add on "pearl" necklace borders. I also made sure that the words "Princess Judy" were on there! All of the flowers were made of fondant in complimentary colors and added at the very end.


I was able to show Judy her cake when I dropped it off. Her face lit up and she was SO excited about seeing her name on the cake. I hope she has a royally delightful party!

Classy Classes

Yesterday, I had the privilege of teaching Tanner and Jamie some very basic cake decorating skills. We worked together for the afternoon and had a blast! Here's how our day went:

We first got together to go over the game plan for the day. We had A LOT to do. The goal was to make a cake for Tanner's mom, Kim, who celebrated her birthday this week. You have to know that Kim absolutely LOVES mooses. LOVES them. So we made that the basis for the cake. It had to have a moose on it in some way. Kim also enjoys banana cake. So Tanner worked on baking a two-layer banana & chocolate chip cake. He took a basic vanilla cake recipe and added banana pudding mix to it. Mmmm!

While the cakes were baking and cooling, we worked on the moose. We found a picture of a cartoony-cute moose online and printed it out to the size that we needed. Then, I taught them how to color-flow and Tanner really did a great job (which you'll see later in this post).

After the cakes were baked and cooled, I showed Tanner and Jamie how to torte and frost a cake to prepare it for fondant. We used a cream cheese icing which tastes great with banana cake.

After the cake was prepped, we worked on the fondant. We all agreed that green would be a great color choice. Working in the food coloring can be pretty exhausting!

And a great work-out too!

After the cake was wrapped safely in fondant, we worked on some techniques. I taught them a bunch of borders and even the basketweave technique!


They each got an opportunity to practice.

And then we got to present the cake to Kim - who was very happy indeed.

Here's the finished cake. Color flow usually takes anywhere from 3-5 days to dry. Here, we improvised and I really think it turned out great! What moose lover wouldn't love this cake?


Tuesday, October 19, 2010

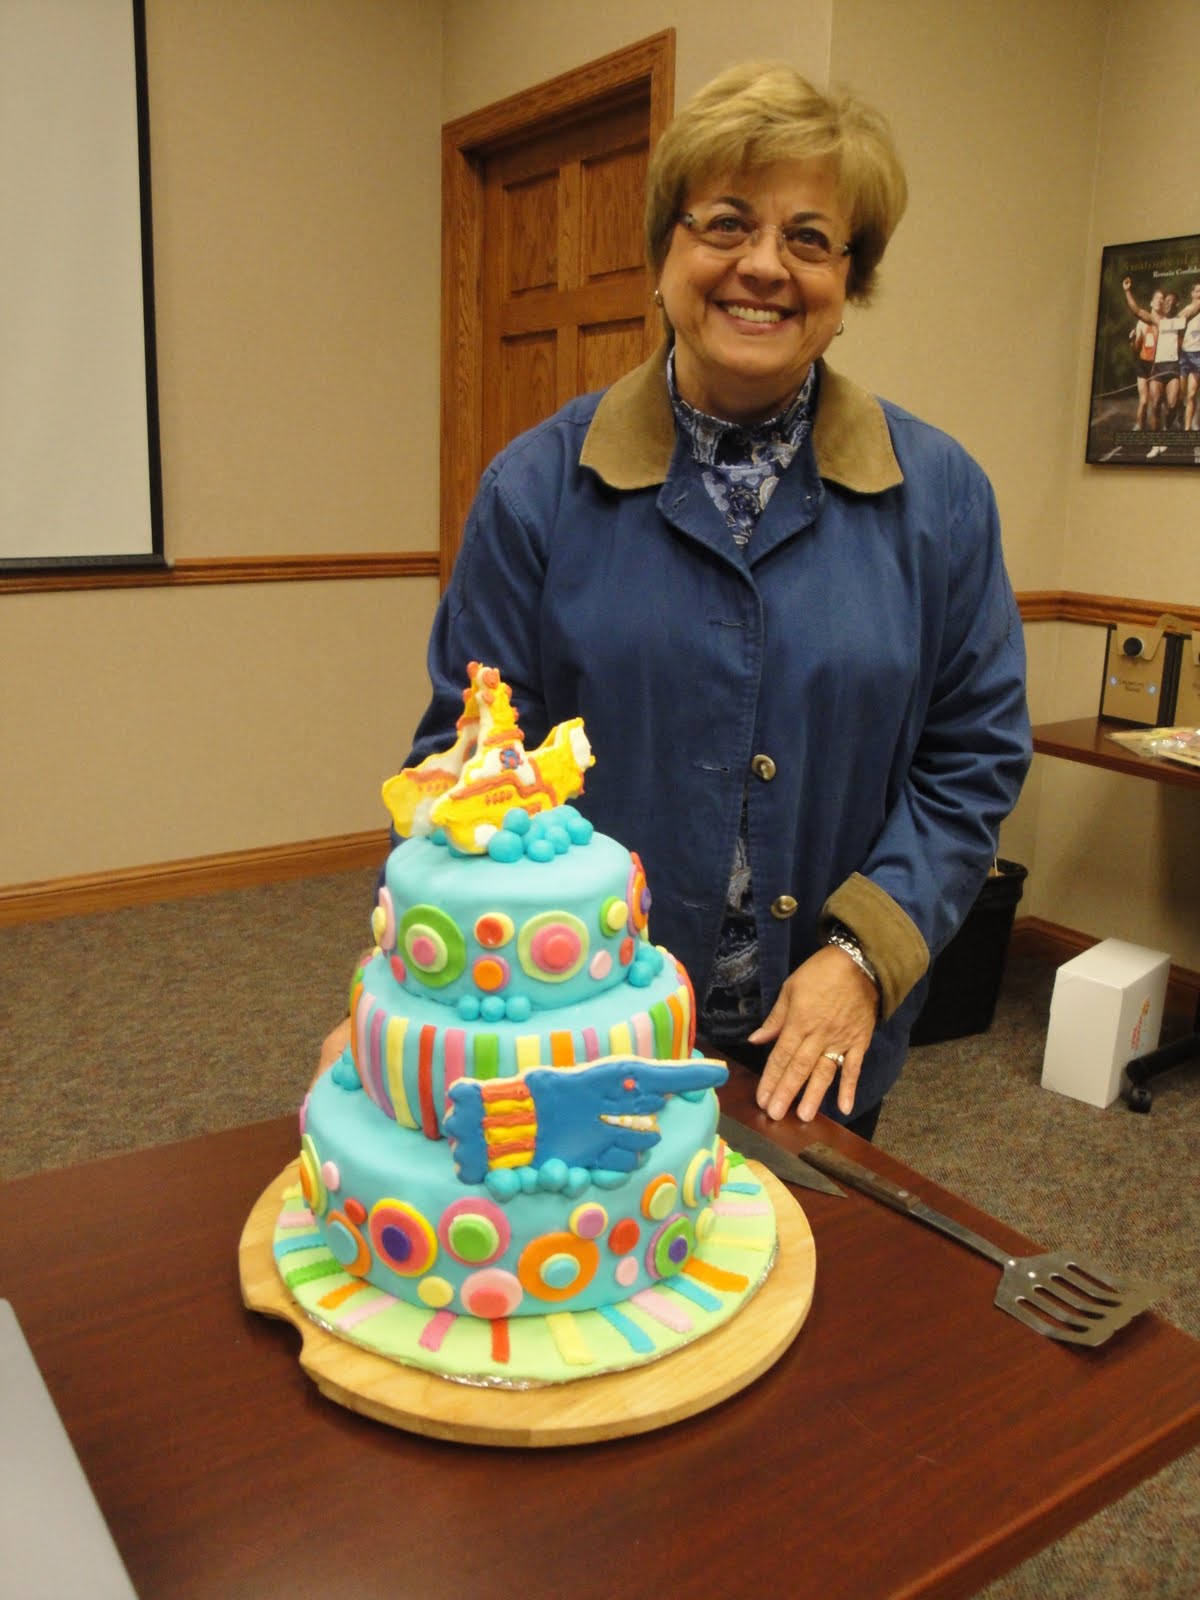
We All Live in One of These (According to the Beatles)

A few months ago, my mom's boss contacted me because he wanted to host a surprise birthday party for my mom's 60th birthday. He asked me to help orchestrate her arrival...and...do the cake. Of course I'd do the cake. Of course!

Now, my mom didn't want ANY mention of the age 60 so that was going to be a little hard for me. When I googled 60th birthday cakes, they all came up with the number 60 on them. Okay...my mom is the BIGGEST Beatles fan on the planet (don't even try to compete with her, you'll lose) so I thought about doing a Beatles-themed cake. A brilliant, vibrant, Yellow Submarine cake came up in my search and I knew instantly that this would be my mom's cake.


This one was so fun - unbelievably fun! I learned the color flow technique for the blue meanie hand and the Yellow Submarine on top. (My Christmas cut-outs are gonna ROCK this year!) And the rest is just fondant work. All homemade fondant.

The bottom tier of the cake was marble with chocolate chip buttercream and chocolate ganache filling. The middle tier was lemon cake with lemon buttercream and lemon curd. Those two tiers we shared at her party.

I packed up the top tier of the cake for her private party with just our family. That one was her favorite: Poppy seed cake with lemon curd and cream cheese filling.

Lots of work, but TOTALLY worth it! Happy Birthday, Mom!


Andrew's Mickey Mouse Clubhouse Cake

I was asked to make Andrew's 2nd birthday cake. What an honor! He was having a Mickey Mouse Clubhouse-themed party. At first, I thought about doing a Mickey head like the Elmo or Buzz Lightyear. But the more I did my research and looked at photos online, the more scary those photos became. Not many really looked like Mickey and I wanted this cake to shine!

The flavor of the cake didn't matter so whenever I'm told that, I go with marble. It seems to please EVERYone. Andrew's cake also had chocolate chip buttercream - just for fun. I made a 6-inch and an 8-inch cake. The topper was a toy I found at Toys 'R Us and I think it fit perfectly!


It blended in nicely at its final destination. :)

And most importantly, Andrew seemed pleased.


Yum!