Tuesday, February 25, 2014

Chocolate Kahlua Cake for Steve-O

I absolutely love making cakes for my dear friend Erin.   You know why?  She sends me completely new recipes to try, offers completely specific decorating ideas and then always ends with, "...or whatever you'd like to do."   I do laugh at her.   A lot.  And I'm laughing right now thinking of her reading this, because it's true.  

Well, her husband will be celebrating his birthday this week, but had a small get together this past weekend.  Steve is a HUGE fan of Kahlua and Erin really wanted that to be incorporated into his cake  (...or whatever...).   So she sent me a recipe from Yumly (Chocolate Kahlua Cake with Salted Hazelnut Buttercream) and I was ever so excited to get 'er done!  


This was probably the most expensive cake I've ever made with 11 eggs, 24 ounces of chocolate, hazelnuts, Kahlua, espresso and so on.  But MAN!!!  I think it turned out beautifully, and would highly recommend the recipe to anyone who likes mocha anything!!!


Here's what the cake looked like on the inside (thanks for the pictures, Erin!).  YUMMY!!!!  


Happy Birthday, Steve!!!  I hope you have a wonderful day!  If you need a shot of Kahlua, I can hook you up!  ;)

Lime Green Cake Pops

Chelsie requested some Lime Green Cake Pops for her friend's birthday this last week.  She wanted to deliver them to her good friend at work as a fun surprise!  Honestly, I can't think of a better surprise on my birthday (hint, hint) and these were sure to brighten anyone's day!  


Half of these were chocolate, and the other half were yellow cake.  I hope they were able to break my secret code (brown marker on the bottom of the sticks for chocolate, yellow marker for yellow cake)!!


Happy Birthday, Chelsie's friend!!  I hope you had a great surprise and a delightful birthday!

Book Club Bon-Bons

I've honestly lost track of how long we've been having our book club.  Seriously, I think we're going on 3 or 4 years by now.  Maybe even longer!  Our dear friend, Kate, started it up as an opportunity for us to get together and visit, while also keeping our noses in books.  It's an easy thing to give up once parenting takes over!  I've SO loved our book club!


Ours meets about once every 6-8 weeks, depending on the length of the book.  We have members who come to EVERY book club, and some who come when time permits, but everyone is ALWAYS welcome!  The best part about our book club, is that you don't have to read the book in order to come!  I mean, it's much better if you have read the book because you'll be a little more engaged in the conversation, but you don't have to read the book.  It's just a really nice night out with "the girls."  

We all take turns hosting book club.  The host supplies the beverages and an optional snack, and then everyone who comes brings a dish to pass.  We can usually count on "dinner" when we meet.  A nice, wonderful, delicious, eclectic dinner.  It's awesome.  

My recent pick was Angry Housewives Eating Bon Bons and what a GREAT book this was!  Even if you're not an Angry Housewife and you don't like bon-bons, this book had a fantastic story that was truly a page-turner and I highly recommend the book.  


But, with the title what it was, I just HAD to make bon-bons for our group.  And these were the ones I made.  Kahlua cake truffle with hazelnut buttercream, dipped in milk chocolate and topped with roasted hazelnuts, and yellow and chocolate cake truffles, dipped in cordial cherry chocolate and topped with sprinkles.  


If you're looking for a good book to read, with great characters and a really great story, pick it up!  It was time well spent for me!!!


Sunday, February 16, 2014

Lightning McQueen and Mater Cake

Tanner wanted a Cars cake for his 4th birthday that featured Lightning McQueen and Mater.  What fun!  This cake is a chocolate cake with Oreos and fudge and buttercream filling.  I decorated the side of the cake with a mountain-esque landscape and the top is decorated like the end of a long, long race.  Mater right by Lightning McQueen's side.  I found both in the toy aisle and Target and thought they were perfect!


I used some candy from our local candy store, Sweet Dreams, that looks like rocks, or in this case, boulders.  They are actually chocolate flavored candies and I think they add a really neat detail to the landscape.  


I was also asked to make a dozen cake pops and theme them to the Cars theme.  I made some red and some black and topped them with gum paste "Route 66" signs and the others were street signs with a #4 or the letter T on it.  You know, Tanner's turning 4!!  :)


Here's what the two look like together.


I hope that Tanner had an excellent birthday party!!

A Horse Cake and a Matching Smash Cake

Soon-to-be-three-year-old-Leila loves horses.  Not a My Pretty Pony horse, or a cartoon horse, she loves horses.  Real horses.  And she loves the colors pink and purple.   I was asked to make her a birthday cake and a cake for her little sister who was turning one right around the same time.  

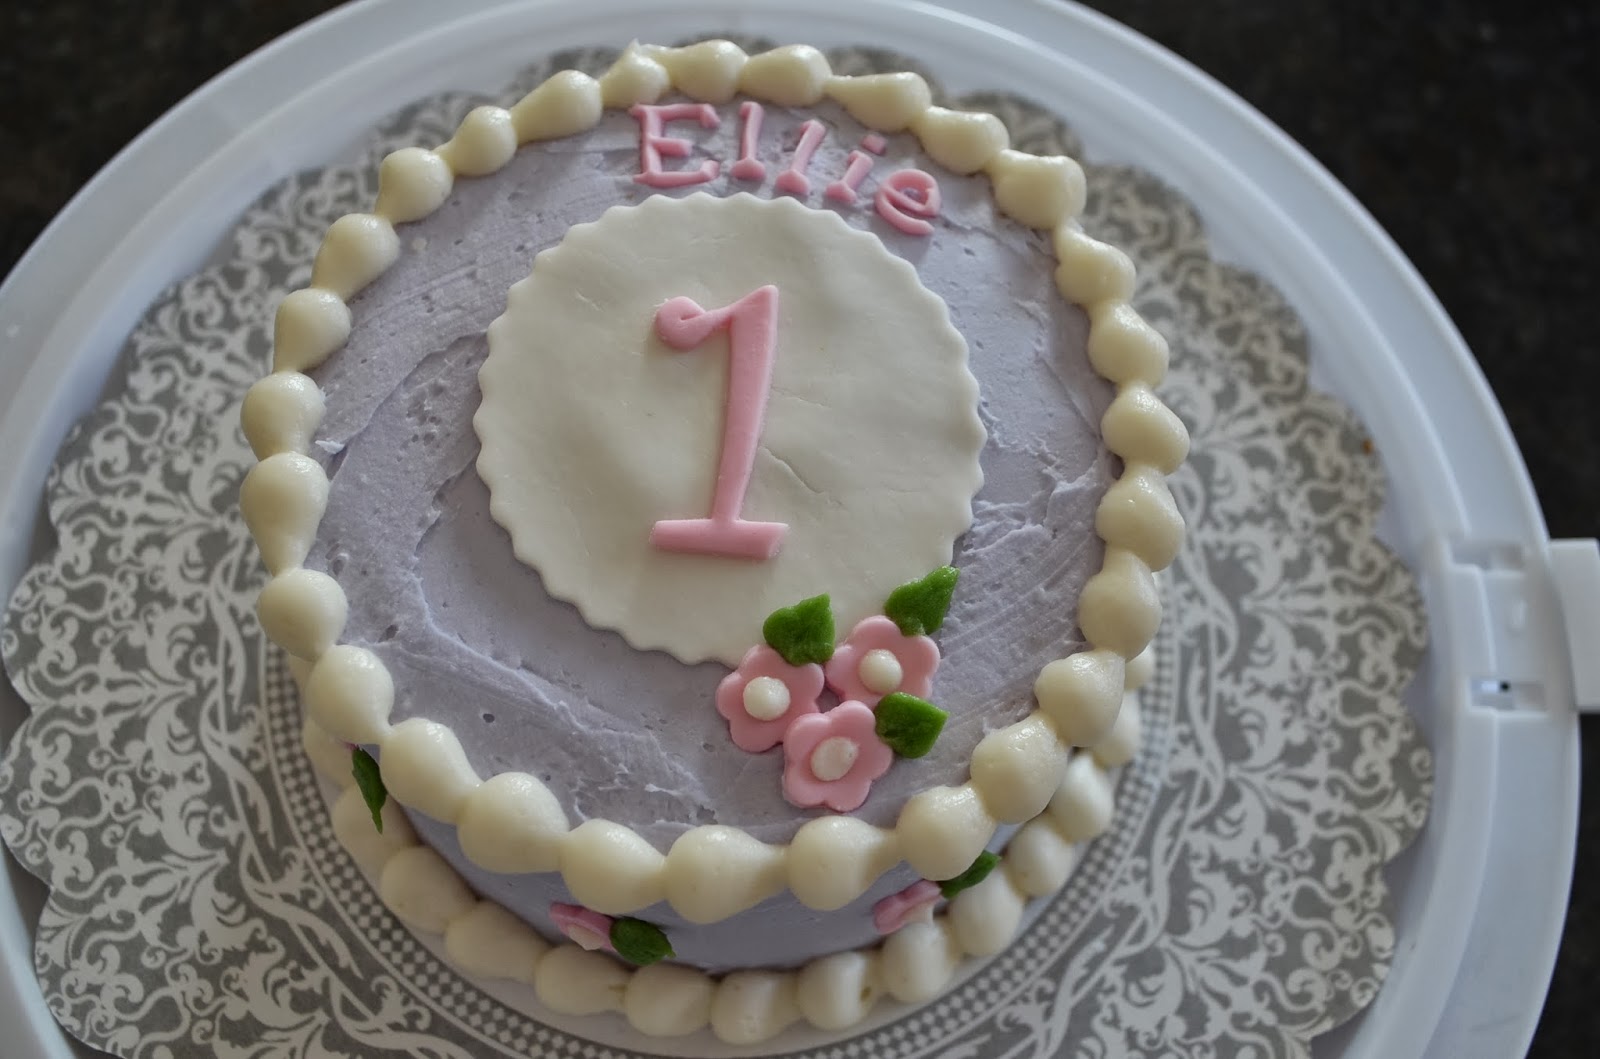
I think these two cakes turned out to be very elegant cakes for these little ladies.  I love the lavendar shade and how it looks with the pink flowers.  

Ellie's cake is a 4 1/2-inch yellow cake with buttercream frosting.  Leila's cake is a 6-inch chocolate cake with Oreos, fudge and buttercream filling.  


I think the two look so pretty together and I most certainly hope that Leila and Ellie had a great birthday celebration!

Update:  When Leila saw her cake, she said, "Mama it's so magical!"  Best.Feedback.Ever.

Saturday, February 8, 2014

Eloise's Woodland Wonderland

First of all, Eloise is adorable and I was absolutely excited to make her 2nd birthday cake.  (Her first one was also made by me - Eloise's Ombre cake.)  I wanted to make sure that her 2nd birthday cake was just as memorable.  

So when I received this invitation in the mail, I was immediately inspired.  I loved all of the little critters joining in the fun and knew I needed to incorporate them into the cake design.  We just had to wait for the RSVPs to come in before I'd know the size of the cake.  


In the meantime, I received an email message from a visitor to my site who wanted to know how I make those gum paste figures on the top of my cakes.  My students also ask this question, so I thought there was no better way to teach this than to show you step-by-step how this is done.  It's easy.  But time consuming.  You've been warned.  ;)

So, the first thing I did was scan in the invitation and save it as a jpeg.  I imported the picture into Word and cropped it so that I could print out the animals in the size I wanted.  Here, they're just about 4" (or so) high.  I had to crop three times to get all of the animals printed in the correct size.  I used plain old printer paper for this.


The next step is cutting each of the little animals out.


Here are the supplies I needed to make these little critters.  A scissors, a rolling pin, an exacto knife, gum paste, Crisco, food coloring in the colors you'll need and a nice work space.


I actually had some brown fondant on hand and mixed it with some gum paste.  I used about a 50/50 mix of each.  I spread some Crisco on my hands and knead the gum paste/fondant mix until it's really elastic and workable.  Think about the consistency of silly puddy.

When it gets to a workable consistency, I spread some Crisco on my work surface and roll it out, about 1/4" thick.

I place the first animal on top and literally trace it out of the gum paste/fondant using my exacto knife.


Like this.  This is my first layer and I'll build the monkey out of this.


I added more white gum paste to the brown to get this color and cut out the beaver the same way I did the monkey.


The monkey's belly also needed that lighter tan color so I cut that out of the monkey cut-out and traced it out of the lighter colored gum paste/fondant mix as well.  If I need help figuring out were to place the cut-outs onto the shape, I just use the paper cut-out as the pattern, like I did below.   Now his belly is where it's supposed to be.


With the varying shades of browns and tans, these little creatures are beginning to take shape.  I use plain old water to stick all of the pieces together.  A very light brushing of water truly acts as glue.


Now I'm working on the eyes.


More eyes...

I used a food marker (shown is a Wilton fine print food safe marker in brown) to draw in the detail work of the mouths and noses of some of the creatures.  


And here they're almost complete.  The frog is my favorite.  I used some luster dust to incorporate the yellow shading.  


Here's the finished product.  A delicious chocolate cake with buttercream filling and a light chocolately buttercream frosting.  


Yep!  I think it passes!  


I hope you have a wonderful party today, Eloise!!  Many blessings to you on so many wonderful years ahead!!