Thursday, February 28, 2013

Chocolate Oscars

My husband and I usually celebrate the Academy Awards with a huge party.  I serve a buffet with tons of themed foods.  25-40 people come, eat, watch the Academy Awards and have a good time.  But, this year, I was feeling something different.  I didn't want a big party.  So, we didn't have one.  But that didn't mean that I didn't make a special treat for us to celebrate an event we love so much!


I ordered this candy mold from eBay a few months ago (honestly, before I decided we wouldn't be having a big party...I didn't want to NOT use it though!!)  The mold makes three Oscars (front and back).  


It's a time-consuming project, but actually pretty easy.  I'm no candy maker, but we all got the gist, right?


I made some in white chocolate too.  


I used Wilton's gold Color Mist spray to spray my little guys gold.

Here's how they turned out.  

I packed each one individually with ribbon I found at Ben Franklin Crafts.  I thought it looked like film!!


 I also found these little popcorn paper bags at Ben Franklin too.  LOVE it!


When I make these again (and I will), I would make them using yellow melting chocolate.  I think they'd turn out better and adding the gold spray would make them shiny and awesome.  Here's to next year!

As for decoration, these were the place settings:


The menu for the evening was typed and placed inside the napkins.  As each guest arrived, they randomly chose a best actor, supporting actor, actress and supporting actress and "followed" that actor through the night.  A special prize was given to each winner.  Like movie candy and microwaveable popcorn.


Here were the centerpieces:


We printed out movie posters of each of the nominees for Best Picture.  I glued them onto cardstock and hung them on the mantel.  I love how this turned out.  


Because I can't resist, I still had to theme our dinner that night.  Here's what we enjoyed to celebrate the evening of good film making:

Slivered Almond Playbooks 
(Slivered Almond and Cheese and Bacon on French Bread Toasts)

D'Mango Unchained
(Mango and Cucumber Lettuce Salad)

Soupa L'incoln
(Onion Soup - Soupa L'Ognion)

Breast of the Southern Wild, Les Vegetables, and Argo-ratin Potatoes
(Chicken Marsala, Roasted Vegetables and Au Gratin Potatoes)

Life of Pie
(Apple Pie)

We enjoyed Amour-etto Sours and Zero Dark Thirsty to wash all of the deliciousness down.  Mmmmm!  Happy Oscars everyone!!!


Gourmet Dinner Club - Flourless Chocolate Cake

My husband and I belong to two Gourmet Dinner Clubs.   It's an inspired idea from my husband's parents who have had their own Gourmet Dinner Club for decades. Here are the rules:  

1.  Each group is made up of four couples.
2.  Each couple has to host a Gourmet Dinner once per year.  (It usually turns out that we get together once per quarter)
3.  The host couple has to collect and assign the recipes for their meal.  Usually, there's some sort of theme.  The goal is to choose recipes that you wouldn't normally cook for yourself.  I encourage challenging recipes because it keeps things interesting and I'm always up for something fun!
4.  Recipes assigned usually are an appetizer, soup or salad and dessert.  The host couple takes on the main course and any additional sides they'd like to serve.  
5.  The host couple also provides the beverages.  We like serving a specialty cocktail in addition to wine and soft drinks, water and coffee.

That's it!  For my husband and I, it becomes a much needed date night with really fun, amazingly hilarious friends, who happen to all be excellent cooks and bakers.  

I thought I'd feature this cake recipe here because it's been awhile since I'd done a dessert.  Usually, I'm assigned something other than dessert because I'm the Cake Mama, but I was excited to try this one and I think it turned out pretty good.  

Here's a link to the recipe that my friend Erin assigned:  

http://www.epicurious.com/recipes/food/views/Flourless-Chocolate-Cake-with-Toasted-Hazelnuts-and-Brandied-Cherries-237344

Flourless Chocolate Cake with Toasted Hazelnuts and Brandied Cherries

First step (done a week ahead) is to soak the dried cherries in brandy and then 2 more days of soaking in simple syrup.   Seriously.  A week + 2 days.  I didn't do it for a full week because I didn't read the recipe all the way through, but I got them soaking for about 4 days and 2 more days in the simple syrup.  

Then, it was melting the chocolate with oodles of butter.  


Doesn't that look divine?  I want to dive in!


If you follow the recipe, you'll discover that you have to separate eggs and beat them according to the directions.  Here, I have my egg whites ready and my egg yolks and chocolate mix ready.  The next step was to combine them.

 Lots and lots of folding the egg whites into the chocolate mixture.  This creates a really fluffy mousse-like consistency.


I put it into my prepared spring-form pan.  The recipe said that it would soufflee in the pan, but it would fall after about 15 minutes.  It did.


But not not before making an incredible mess in my oven....Ugh.  (Good news?  My oven is now really clean!!!)

An interesting tidbit was that the recipe said to press the edge of the cake down to make it level with the center of the cake.  I'd never done that before, but was game!  I made some ganache and spread that over the top of the cake in two layers and my husband added the toasted hazelnuts to the side of the cake.  Voila!


Here's the finished product with brandied cherries and homemade whipped cream.    It really was something else!  

In case you're curious, here are the other items served with this Valentine's Day feast:

Oysters Rockefeller (http://www.epicurious.com/recipes/food/views/Oysters-Rockefeller-231165)


 Fried goat cheese, fig and almond salad.


Main course was marinated salmon, garlic potatoes and roasted asparagus.


What a great meal.  What great company!

Sunday, February 17, 2013

Adrienne and the Princess and the Popstar

So, there's Barbie.  And there's a Popstar.  And then there's the Princess & Popstar, which is the party that 4-year old Adrienne was having.  My good friend Tara requested a guitar-shaped cake for her daughter's special occasion.  Yep. I was up for the challenge.  


A few issues surfaced while making this cake.  It had to serve about 25 people, which isn't a whole heck of a lot of cake.  Maybe a ten-inch cake would suffice and there'd be leftovers for sure.  But if I made an 8-inch cake, I think that would be a little small and you wouldn't get the full effect of a GUITAR!  So, I decided on two 10-inch square cakes and lined them up next to each other.  The big part of the guitar is carved from one whole 10-inch cake.  The handle is actually two pieces of cake (10-inch cake sliced in half).  And this is a chocolate cake with chocolate fudge and Oreo filling.  

The second issue I had was where to put the cake when it was done?  No cake board I could find was big enough!  So, off to Ben Franklin Crafts I went to do my searching.  They had large pieces of foam board ready to go, and that's what I purchased.  I thought it worked out perfectly!  


The little knobby dials are made out of melted chocolate and silver sprinkles.  A yummy treat on top of the cake.


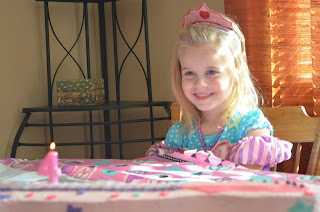
And here's the Princess.  Or is she the Popstar?  Whomever she is, she's the ADORABLE birthday girl!


Make a wish!


Thanks for the great party, Adrienne!  I'm so happy I got to be a part of your special day!

Friday, February 15, 2013

Happy Birthday, Dear Robin!

I've always done something different for my friend Robin's birthday.  A few years ago, I did the mosaic cake.  Last year it was a hummingbird cake.  This year, I thought I'd change it up for her and give her an assortment of cupcakes for her birthday.  I practiced a few new cupcake topping techniques in the process.  I love how they turned out!


Happy Birthday, dear friend!  I hope you have a wonderful day!  Free of worry.  Free of stress.  Plenty of love and plenty of bliss!

Love,
Ann 

Wednesday, February 13, 2013

It's A-Me! Mario!

Sharon requested a Super Mario cake for a birthday celebration.  She needed it to feed only 4 people, so we decided on a simple 6-inch cake.  She requested a funfetti cake and I'd never made one from scratch before.  I love my yellow cake batter and just added some sprinkles to make batter look like this:  


Decorating a Mario cake was SO fun for me!  I LOVED playing ALL Mario games from my childhood through college and even as an adult.  Mario has a very special place in my heart.  So here's what I did...


I've had these brick templates for so long and I FINALLY got to use them!  Check out the bricks!


Coins were made from the letter "O" cut-outs I had.  I just didn't take out the center.


 Warp zone!!!


 And here's Mario again!  What a fun cake!


Thanks, Sharon, for the super fun project!  I hope you all enjoy the cake!


Sunday, February 10, 2013

Ben's Umizoomi Cake

I LOVE that my oldest daughter is the age she is.  I'm totally "in-the-know" about most of the children's television programming that's available today.  If you would have asked me who Team Umizoomi was five years ago, I would have said, "Gesundheit" and laughed at you!

Well, luckily for Shelly, I was aware of Team Umizoomi when she requested a Geo cake.  She gave me a sample picture of the cake she wanted and I found that very helpful.   

Here's Team Umizoomi.  Geo's on the right.  


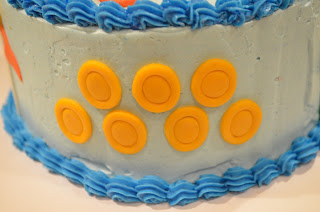
And here's the cake!  It is a marble cake with creamy buttercream frosting/filling.   Gum paste/fondant details  decorate the cake.


I hope that Ben has an absolutely fabulous 3rd birthday party!  Shelly - thanks so much for thinking of me!

Eloise and the OMBRE Cake

It happened.  It finally happened.  My good friend Kate requested this beautiful pink-shaded rosette cake for her daughter Eloise's 1st birthday.  I later discovered that this cake was referred to as a type of "Ombre" cake, named after a style of hair.  Anyway, I was SO excited to do this cake!

For the amount of people that she was hosting for the party, I recommended a 10-inch cake and 24 cupcakes.  She wanted a yellow cake and chocolate cupcakes and that was perfect for the coloring I had to do!

So I started out with yellow cake batter.  I used Martha Stewart's recipe and it was absolutely delicious, tender and moist.  I started with the darker colors first and finished with the lightest.  I split each batch of batter (I had to make two) into two pans.  They didn't bake as long and they made smaller layers, but there's no waste; no dome to cut off.  


After I finished with the four shades of pink cake (only two are shown), I stacked and crumb-coated the cake using the most delicious buttercream frosting I've ever had.  No shortening.  Pure butter.  And no confectioners sugar either!  It called for granulated sugar.  It was amazing...oh so creamy.  Not gritty AT ALL!  LOVE this stuff!!!


I stacked them starting with the darkest color on the bottom, working up to the plain yellow cake on top. 


Then I decorated the outside of the cake using Wilton tip 1M.  I made rosettes in each of the shades of pink to correspond to the shades inside the cake.  .


Then I also made some chocolate cupcakes and used the different shades of pink buttercream to decorate them as well.  Also with tip 1M.


Here's the cake and cupcakes at their destination....


 And here's the beautiful little birthday girl!


And here's what the cake looked like on the inside!


Happy 1st Birthday, Eloise!  I KNOW you enjoyed that cupcake!!!


Thanks for inviting me to your party!  I loved being a part of your special day!!